All projectors require some maintenance. Digital projectors (LCD, DLP, L-COS) produce a lot of heat. To remove this heat they have fan forced cooling with filters. Regular maintenance requires that these filters be cleaned or changed. For my projector Sony specifies that this be done every 300 hours for normal conditions, more frequently for dusty conditions.
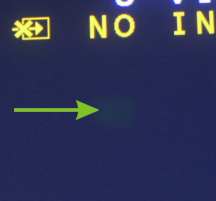
Filtration is important because any dust particles that end up in the wrong place in the projector can cause visual anomolies screen. These are most commonly caused by dust on the green LCD panel, dust on the red or blue LCD panels tend not to show up as well. The symptom is green fuzzy patches that are visible in dark passages. They look something like this:
Green "Dust Blob" just visible in this slightly overexposed picture. Caused by dust on the green LCD panel.
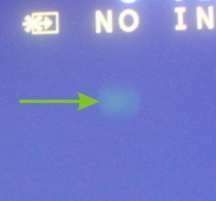
Green "Dust Blob" is very visible in the way overexposed picture. Actual on-screen size of the blob is about 6 inches.
Once you've got "Dust Blobs", what can be done?
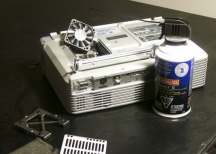
Fortunately they don't happen all that often (I've been infected twice in 1000 operating hours), when they do, get out a can of compressed air and prepare for battle.
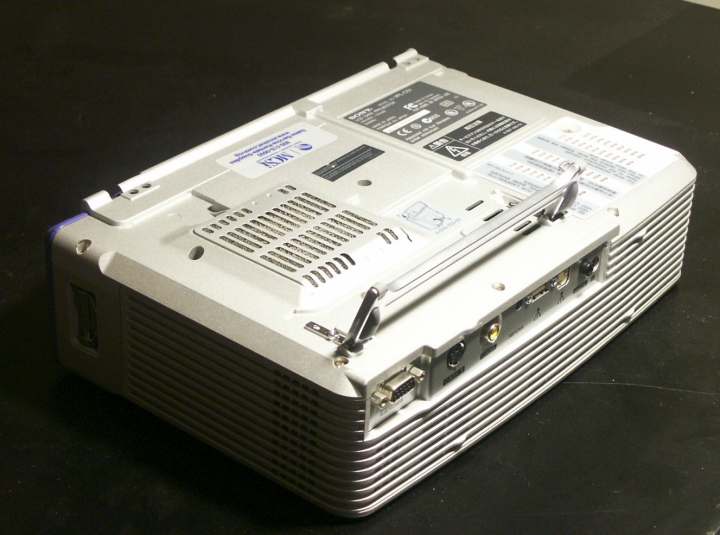
The following photos show where the LCD panels and polarizer's are located on the Sony VPL-CS1 and how to clean this area. Click on photos for a larger view.
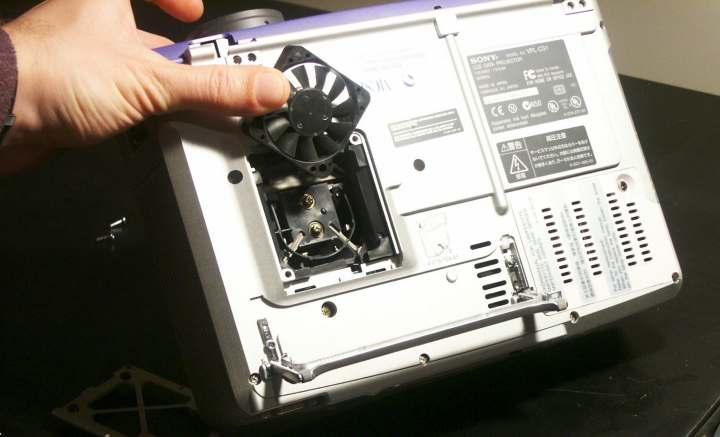
View of the underside of the projector. Filter is under hatch on left side, lamp is under the hatch on the right rear.
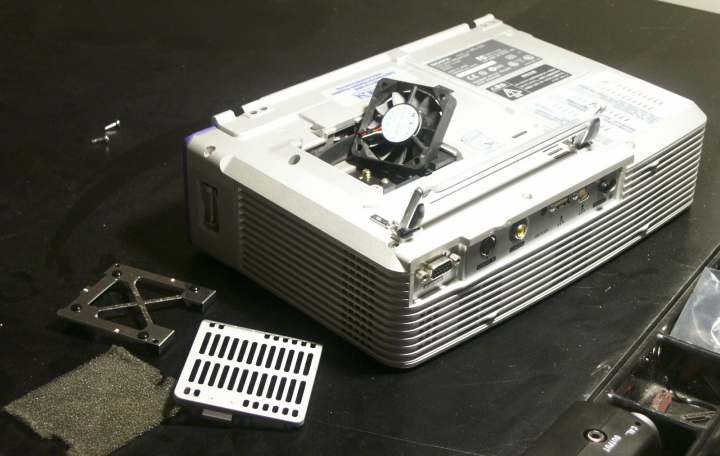
Filter hatch opened and fan bracket removed. Filter is gray foam in lower left. Clean the filter with canned air or wash and dry thouroughly before replacing.
I am holding the projector vertically so that the canned air will be vertical while in use. This helps prevent any liquid from the can from being sprayed into the projector.
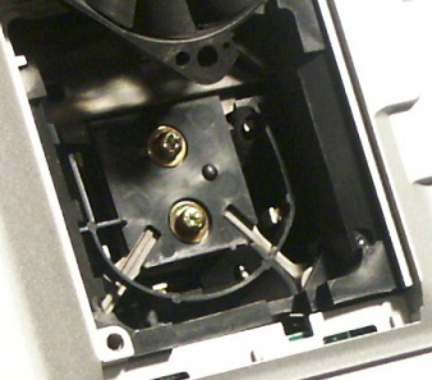
Close up of the LCD and polarizer area. You've got to blow out all the crevices in this area, using care not to scratch or dislocate anything.
All done. Dust blobs are history. We're back, ready for action!