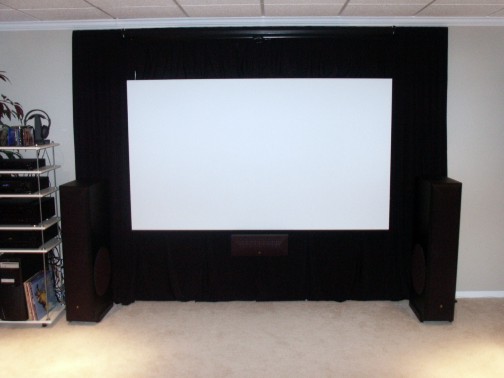
Finally worked out a screen design I am happy with. I used a full sheet of 3/4" thick MDF board, cut to 87" x 49" a 16:9 aspect ratio (MDF is nominal 8' x 4' but actually measurs 97" x 49"). This board is really, really heavy (no way will it warp) with a very smooth surface. I attached 1" x 6" x 6' cleats to the back of the MDF board, top and bottom, with glue and wood screws. These are to reinforce the board and provide a strong place to mount the hooks to hang the screen with.
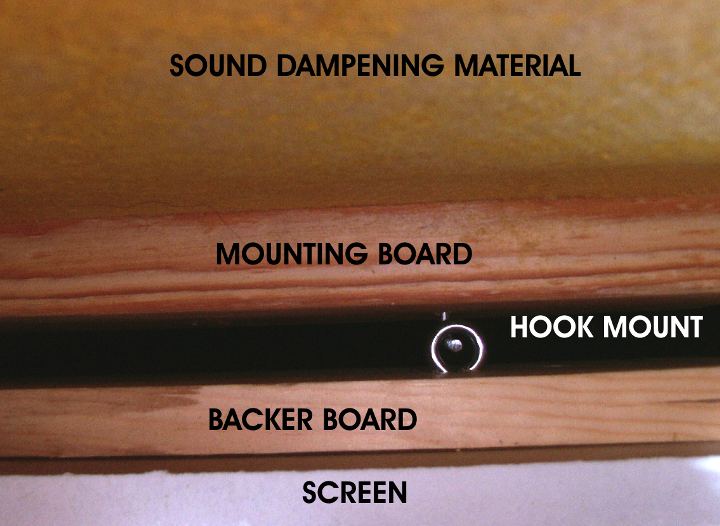
I decided to use hooks for several reasons:
- Allow the screen to be mounted without driving screws through the face of the board.
- Allow the screen to canted (angled) forward at the bottom to offset keystoning caused by the projector mounting position.
- Allow the screen to be removed easily for repainting.
The board was painted with two coats of Sherwin-Williams flat white paint (could be any quality brand), then two coats of ICI Dulux Dorian Grey, mixed with white; 1 part grey to 5 parts white. The board was horizontal for painting, painting was completed with a smooth texture roller, the best quality I could find. I painted some posterboards first and put them in front of the screen to see which shade looked best before deciding on the 1 to 5 mixture.
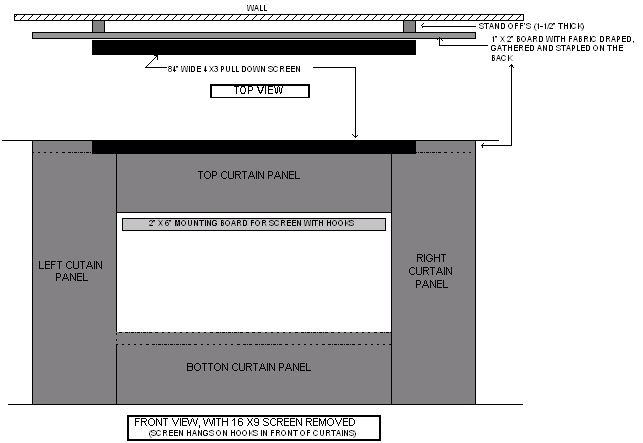
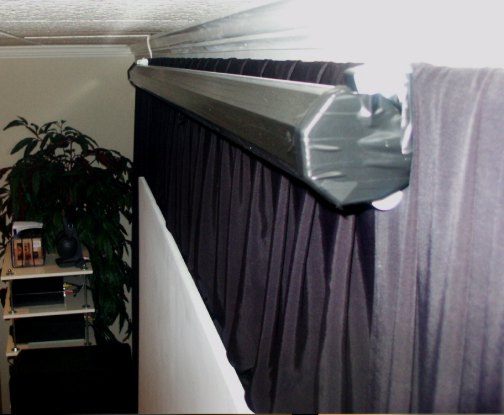
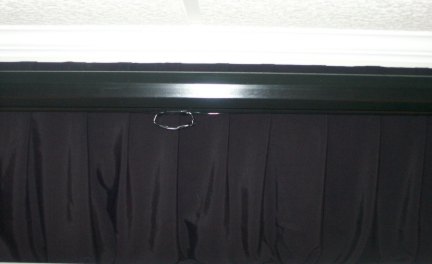
The screen was hung from a 2" x 6" x 6' board mounted to the studs. The screen mounts in front of the masking/light absorbing drapes, so that it appears to be "floating" in front of them.
For 4x3 sources, which tend to be kids movies and TV, I mounted my original 84" Apollo pull down screen above the new screen. Since the case of this unit is white, and I didn't want to take a chance on getting paint on the screen while painting it black, I covered it in electrical tape. You can see that it is tape if you get really close, and shine a light on it so you can see the wraps, otherwise you'd think it came that way.
20 May 2002 Update: I have repainted my screen with White High Gain CRT Screen Goo, to accomodate the CRT projector. I rolled the Goo on the existing screen following the directions on the Goosystems website and I am very pleased with the results. I can see where spraying this material is likely even better than rolling it, beacause the coating would be more uniform. I only used about half of the Goo, so I may try spraying it in the future. This new surface really makes a difference, it is definately "not subtle", images are brighter, have darker blacks and more contrast. I helps quite a bit to reduce the "back scattered" light (light that reflects from the room back to the screen) by directing the reflected light towards the viewer instead of the walls and ceiling. Although the grey screen improved the contrast for the LCD projector, I think it benefits from the higher gain screen also. Seems to be more definition in the dark grey areas of the image.
01 July 2002 Update: I repainted the screen yet again. I used the second half of my Screen Goo, only I sprayed it with a Wagner Power Painter instead of rolling it. This is definately the way to go with this material, all they roller marks and uneven finish that I had when rolling the high gain goo are gone! I think the rolling would be fine for the lower gain mix, and I know its great for the flat finish DIY grey paint mix, but this stuff really needs to be sprayed. (more comments on my experience here)
24 May 2003 Update: I've had several more experiences working with Screen Goo, both CRT white and digital grey versions. My experience tells me that if you are going to build a screen with any goo product, by all means spray it! Rolling is theoretically possible but my results have been mixed at best and always inferior to spraying.
If you are looking for a good quality, low cost screen coating that can be rolled, you might consider just using the base coat Goo products. The base coats do not have the gain or "punch" that the top coat product has but the basecoat will provide a proper white or grey matte screen finish.
____________________
The black material behind the screen is a jet black, flat finish, 60" width, heavy weight polyester. I found it at Jo-Ann Fabrics store. It was in the close outs, so I bought all they had (10 yds), almost all of it was used up and I have never found the same fabric there again. When I purchased material for my masks, I got black polyester velvet finish fabric, not quite as heavy as full velvet, but more light absorbing than what I used for the curtains. I also got this material at Jo-Ann Fabrics, where it is a regular stock item, at least here in MI. Here is how the curtain and mounting system works: